
 Here is page 9 of the vintage cookbook: Home Baking Made Easy that was published in 1953 by Lever Brothers Company.
To review all pages in this booklet, simply visit the Home Baking Made Easy: Spry Category and click on a page title to review that section.
There are scans of each of the pages, you can click the full-page pictures to view a larger size.
 EASY “WATER-WHIP” PIE SHELL
RECIPE FOR 9″ PIE SHELL
1/2 cup less 1 tablespoon Homogenized Spry
3 tablespoons boiling water
1 teaspoon milk
1 1/4 cups all-purpose flour (sifted once before measuring)
1/2 teaspoon salt
This recipe also makes 6 tart shells.
Follow Spry’s “Water-Whip” Method (pp. 6-7). Do not divide dough in half. Shape dough into one round, roll between waxed paper (p. 7).
To make shell and rim, see below.
If shell is to be baked fist, prick all over with fork. Bake in very hot oven (450° F.) 14-19 min.
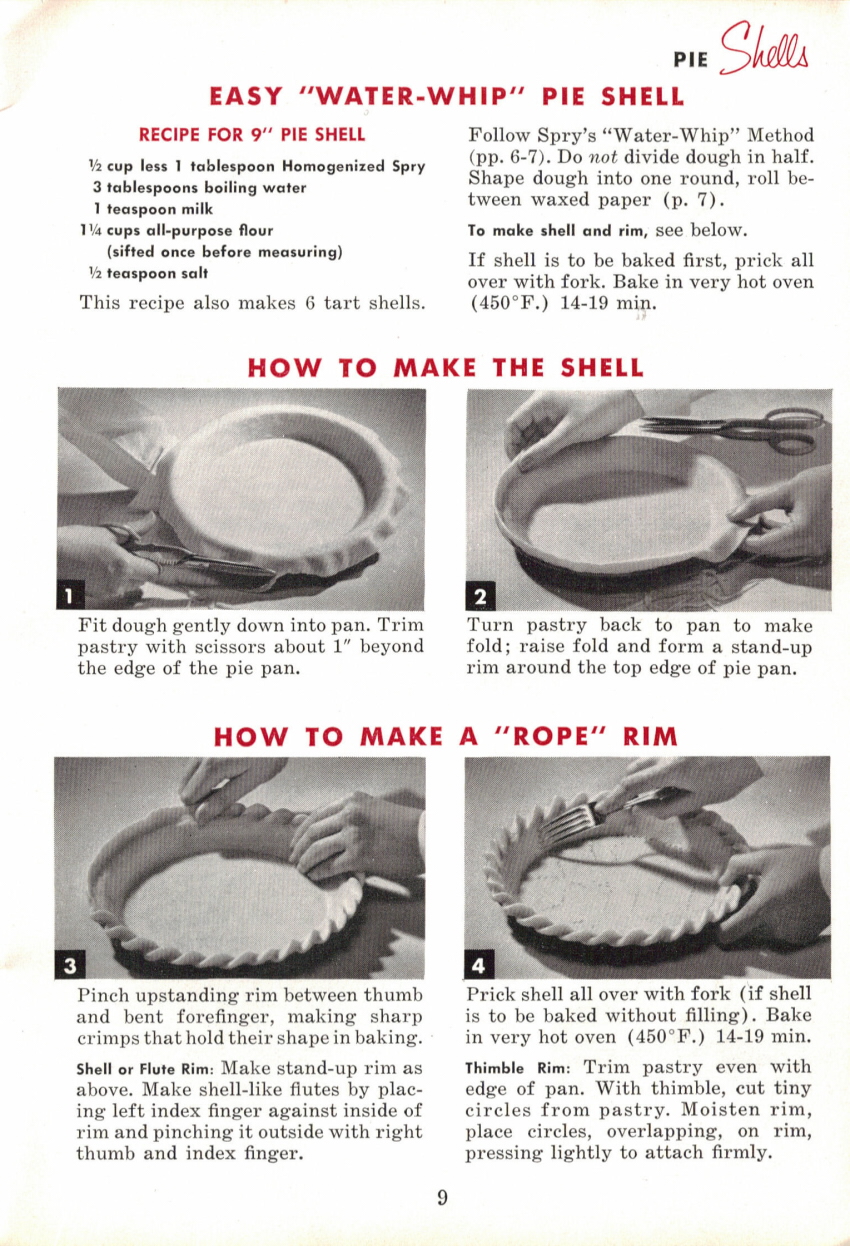
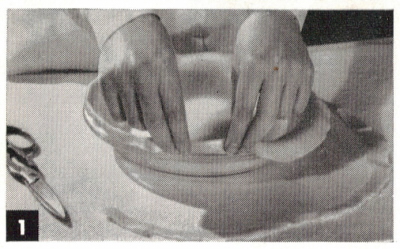
HOW TO MAKE THE SHELL
Fit dough gently down into pan. Trim pastry with scissors about 1″ beyond the edge of the pie pan.

Turn pastry back to pan to make fold; raise fold and form a stand-up rim around the top edge of pie pan.
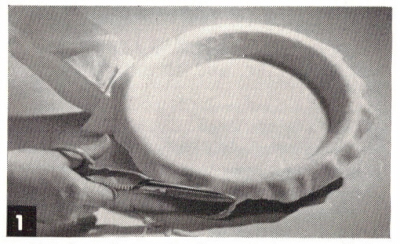
HOW TO MAKE A “ROPE” RIM
Pinch upstanding rim between thumb and bent forefinger, making sharp crimps that hold their shape in baking.
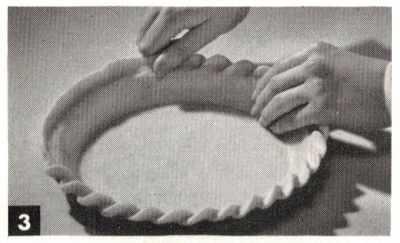
Prick shell all over with fork (if shell is to be baked without filling). Bake in very hot oven (450° F.) 14-19 min.
Shell or Flute Rim: Make stand-up rim as above. Make shell-like flutes by placing left index finger against inside of rim and pinching it outside with right thumb and index finger.
Thimble Rim: Trim pastry even with edge of pan. With thimble, cut tiny circles from pastry. Moisten rim, place circles, overlapping, on rim, pressing lightly to attach firmly.
Here is page 8 of the vintage cookbook: Home Baking Made Easy that was published in 1953 by Lever Brothers Company.
To review all pages in this booklet, simply visit the Home Baking Made Easy: Spry Category and click on a page title to review that section.
There are scans of each of the pages, you can click the full-page pictures to view a larger size.
 Two-Crust Pies
“MY DELIGHT” APPLE PIE
Everybody’s favorite—lightly spiced. A tart, firm apple that holds its shape in baking is best for pies.
Bake in hot oven (425° F.) 45-55 min.
Makes one 9″ pie.
1 recipe “Water-Whip” Piecrust (p. 6)
6 cups pared, cored, thin apple slices
1 cup sugar*
3/4 teaspoon cinnamon
1/4 teaspoon nutmeg
1/8 teaspoon salt
1 teaspoon lemon juice
1 tablespoon butter or margarine
Make pastry (pp. 6-7); roll one half about 1/8″ thick and line a 9″ pie pan. Arrange half of sliced apples in pan. Mix sugar, spices, salt and lemon juice and sprinkle half over apples. Arrange remaining apples on top and sprinkle with remaining sugar. Dot with butter. Trim pastry even with pan. Roll remaining dough and lay over apples. Trim pastry 1/2″ beyond pan, fold it under bottom crust, press edges together with fork. Cut slits in top for steam to escape. Brush top with slightly beaten egg white and sprinkle with sugar. Bake as above.
*For very juicy apples, add 1 tablespoon CORNSTARCH to sugar mixture; mix well.
GOLDEN LACE PEACH PIE
Juicy-rich, with a pretty “lattice” top! Easy to make with canned peaches.
Bake in hot oven (425° F.) 50-60 min.
Makes one 9″ pie.
3 cups canned sliced peaches, drained
1/2 cup brown sugar, firmly packed
1/3 cup peach sirup
2 tablespoons lemon juice
2 1/2 tablespoons quick-cooking tapioca (or 3 1/2 tablespoons flour or cornstarch)
1/8 teaspoon salt
1 teaspoon grated orange rind
1/4 teaspoon almond extract
1 recipe “Water-Whip” Piecrust (p. 6)
1 tablespoon butter or margarine
Combine first 8 ingredients. Make pastry (pp. 6-7). Roll one half about 1/8″ thick and line a 9″ pie pan. Trim pastry 1/2″ beyond pan, turn dough back; make a fluted rim (p. 9). Fill pie shell with peach mixture. Dot with butter. Roll remaining dough and cut into strips 3/8″ wide. Lay 7 strips over peaches; lay 7 more strips across them diagonally. Fasten ends of strips to rim. Brush strips with milk. Bake as above.
Lattice Tops: Use a pastry wheel to cut strips with “pinked” edges. For a woven lattice top, interlace strips.
HOW TO SEAL IN FRUIT JUICES
First cut off undercrust even with edge of pan. Then cut top crust 1/2″ beyond pan; turn it under bottom crust.
Press upper and lower crusts together with floured fork. Or crimp edges together with thumb and forefinger.
Here are pages 6 and 7 of the vintage cookbook: Home Baking Made Easy that was published in 1953 by Lever Brothers Company.
To review all pages in this booklet, simply visit the Home Baking Made Easy: Spry Category and click on a page title to review that section.
There are scans of each of the pages, you can click the full-page pictures to view a larger size.
SPRY’S EASY “WATER-WHIP” METHOD
Now at last there’s a way to make tender, flaky pastry that does away with tiresome cutting-in of shortening and takes out all the guesswork about how much water to add. It’s Spry’s easy “Water-Whip” Method, developed by Home Economists in the Lever Test Kitchens. This time-saving method is possible only because Spry is homogenized—pre-creamed to mix directly with liquids. Your piecrust is ready to roll in seconds—a new easy way that’s neat and tidy!
With the same basic method you can make two-crust fruit pies, pie shells, meat pies, tarts, turnovers and individual pastry shells! Follow the directions exactly and you’ll have easy-to-handle, deliciously tender pastry every time.
HERE’S ALL YOU DO
RECIPE FOR 9″ TWO-CRUST PIE:
3/4 cup Homogenized Spry
1/4 cup boiling water
1 tablespoon milk
2 cups all-purpose flour (sifted once before measuring)
1 teaspoon salt
This recipe also makes enough pastry for a 9″ lattice-top pie or for 9 tart or patty shells.

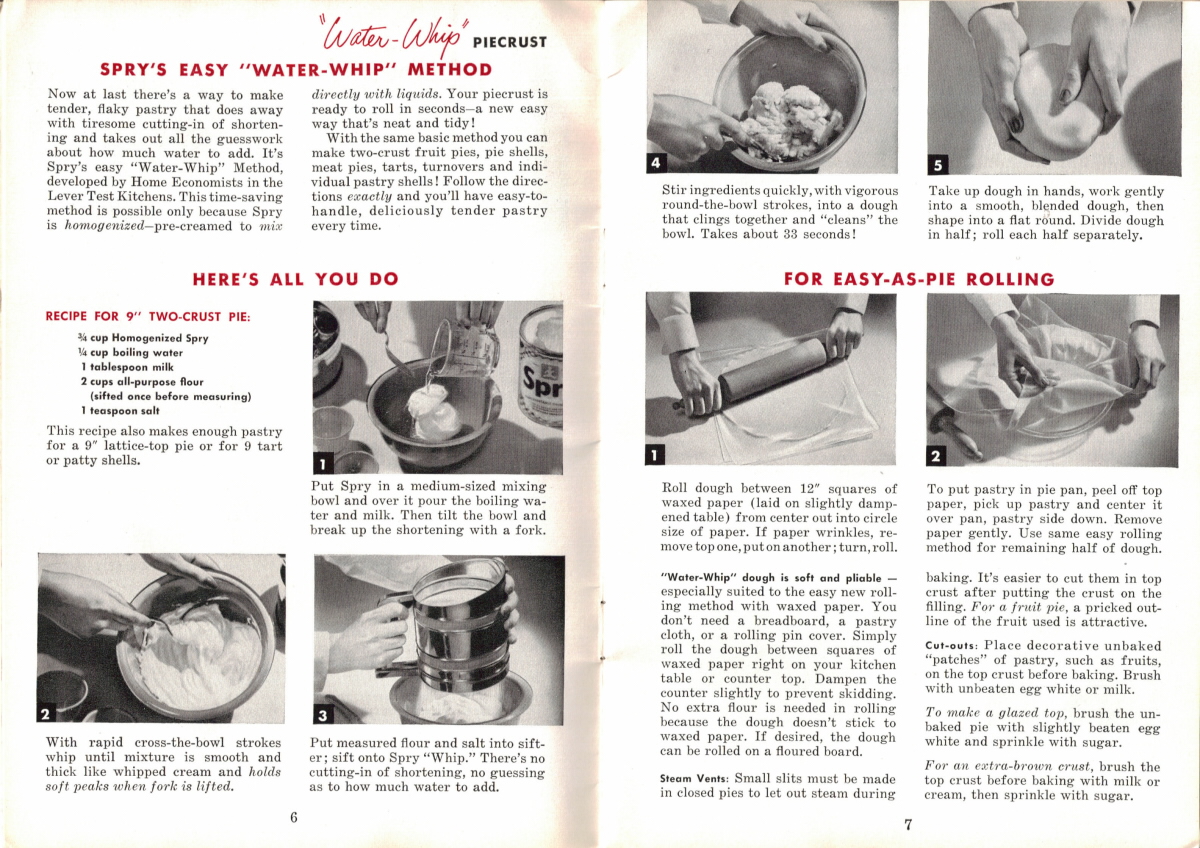
Put Spry in a medium-sized mixing bowl and over it pour the boiling water and milk. Then tilt the bowl and break up the shortening with a fork.
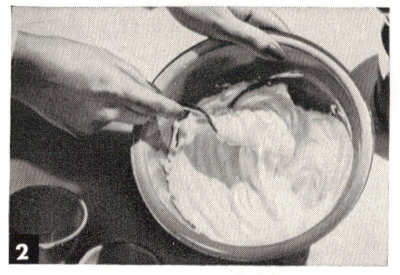
With rapid cross-the-bowl strokes whip until mixture is smooth and thick like whipped cream and holds soft peaks when fork is lifted.

Put measured flour and salt into sifter; sift onto Spry “Whip.” There’s no cutting-in of shortening, no guessing as to how much water to add.
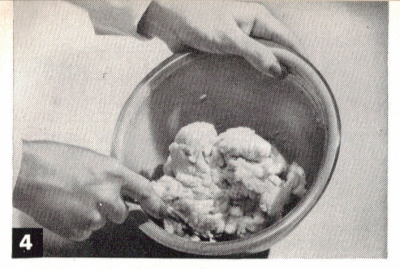
Stir ingredients quickly, with vigorous round-the-bowl strokes, into a dough that clings together and “cleans” the bowl. Takes about 33 seconds!

Take up dough in hands, work gently into a smooth, blended dough, then shape into a flat round. Divide dough in half; roll each half separately.
FOR EASY-AS-PIE ROLLING
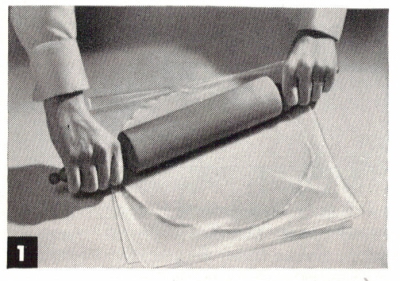
Roll dough between 12″ squares of waxed paper (laid on slightly dampened table) from center out into circle size of paper. If paper wrinkles, remove top one, put on another; turn, roll.
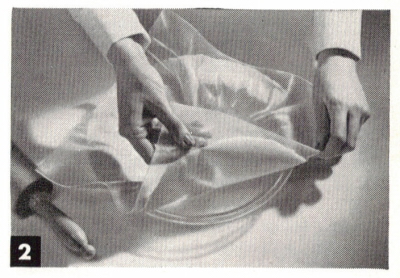
To put pastry in pie pan, peel off top paper, pick up pastry and center it over pan, pastry side down. Remove paper gently. Use same easy rolling method for remaining half of dough.
“Water-Whip” dough is soft and pliable–especially suited to the easy new rolling method with waxed paper. You don’t need a breadboard, a pastry cloth, or a rolling pin cover. Simply roll the dough between squares of waxed paper right on your kitchen table or counter top. Dampen the counter slightly to prevent skidding. No extra flour is needed in rolling because the dough doesn’t stick to waxed paper. If desired, the dough can be rolled on a floured board.
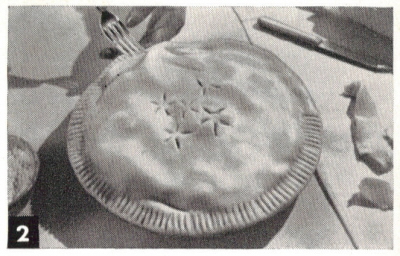
Steam Vents: Small slits must be made in closed pies to let out steam during baking. It’s easier to cut them in top crust after putting the crust on the filling. For a fruit pie, a pricked outline of the fruit used is attractive.
Cut-outs: Place decorative unbaked “patches” of pastry, such as fruits, on the top crust before baking. Brush with unbeaten egg white or milk.
To make a glazed top, brush the unbaked pie with slightly beaten egg white and sprinkle with sugar.
For an extra-brown crust, brush the top crust before baking with milk or cream, then sprinkle with sugar.
Here is the last section of page 5 of the vintage cookbook: Home Baking Made Easy that was published in 1953 by Lever Brothers Company.
To review all pages in this booklet, simply visit the Home Baking Made Easy: Spry Category and click on a page title to review that section.
You can view a scan of this on this previous page (at bottom): Meaning Of Baking Terms.
HOW TO USE YOUR OVEN
If your oven has a temperature control, set dial at temperature called for in recipe and turn on heat 10-20 minutes before oven is needed.
If you do not have a regulator, keep a portable oven thermometer in the oven as a guide to the correct baking temperature and any needed adjustments of heat.
Check your recipe for approximate baking time required. If your oven is correct, the product should be done within the indicated range. (Other indications of doneness, p. 13).
If any food spills in the oven, wipe it out as soon as the oven is cool.
Place pans as near center of oven as possible. If your oven rack is not large enough to take two layers without touching sides of oven or each other, stagger layers on two racks so that one layer is not over the other.
Your baking sheet should be small enough to allow the heat to circulate completely around it (it should never fill the oven).
Here is the last part of page 4 and the first part of page 5 of the vintage cookbook: Home Baking Made Easy that was published in 1953 by Lever Brothers Company.
To review all pages in this booklet, simply visit the Home Baking Made Easy: Spry Category and click on a page title to review that section.
There are scans of each of the pages, you can click the full-page pictures to view a larger size.
You can view a scan of this on the previous page (at bottom): Meaning Of Baking Terms.
TIPS FOR EASIER BAKING
To Cut Dates, Raisins, Marshmallows: Use scissors dipped in water.
To Scald Milk: Heat to just below boiling point and until tiny bubbles appear at the sides of pan.
To Break Eggs: Crack in the middle with a knife or against the edge of a mixing bowl.
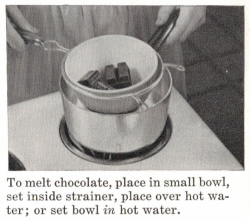 To Melt Chocolate: Melt chocolate over hot water, since it scorches readily.
To Make Chocolate “Curls”: Use a vegetable peeler or a sharp knife.
To Plump Raisins and make them easier to chop: Shake into a strainer and place over boiling water. Cover and steam about 10 minutes.
To Keep Bananas and Apples from Discoloring: Sprinkle with lemon, orange, grapefruit or pineapple juice.
To Prepare Apples for Pie: Cut apples into quarters, remove core from each quarter, drop into lightly salted water, then remove (this prevents discoloration). Pare and cut in lengthwise slices about 1/4″ thick.
To Store Cookies: To keep crisp cookies crisp–and soft cookies soft–store each in its own covered container.
To Whip Cream: Have bowl and beater well chilled. Beat until cream will hold its shape when beater is lifted out of bowl.
To Grate Fruit Rinds: Wash fruit and wipe dry. Working over a piece of waxed paper, rub fruit on grater. Grate only the outer colored rind.
To Cut Nuts: Cut in small pieces with sharp knife or scissors. Or break into large pieces with fingers. Or chop with long straight knife on board, swinging handle around in quarter circle.
To Blanch Almonds: Shell. Cover with boiling water and let stand 2 minutes or until skins are wrinkled. Drain, put in cold water, rub off skins and dry on a towel.
To Sliver Almonds: While still soft from blanching, cut almonds into thin lengthwise pieces with scissors or sharp knife or vegetable peeler.
To Toast Almonds or Coconut: Spread a thin layer in a shallow pan, toast in moderate oven (350° F.) until a delicate brown, stirring often.
To Tint Coconut: Add a few drops of food coloring, then rub between the palms of the hands to color it evenly.
To Tint Frosting for Cake: Add one or two drops of food coloring. Keep coloring delicate.
Here is part of page 4 of the vintage cookbook: Home Baking Made Easy that was published in 1953 by Lever Brothers Company.
To review all pages in this booklet, simply visit the Home Baking Made Easy: Spry Category and click on a page title to review that section.
There are scans of each of the pages, you can click the full-page pictures to view a larger size.
MEANING OF BAKING TERMS
Beat: Blend ingredients rapidly by using a brisk whipping or stirring motion.
Blend: Mix two or more ingredients together thoroughly.
Stir: Blend ingredients with a circular motion of the spoon until all ingredients are well blended.
Fold: Combine ingredients by cutting vertically down through the mixture with a spatula or spoon and gently lifting a portion of the mixture to a new spot, at the same time turning the bowl to cut and fold in a new spot.
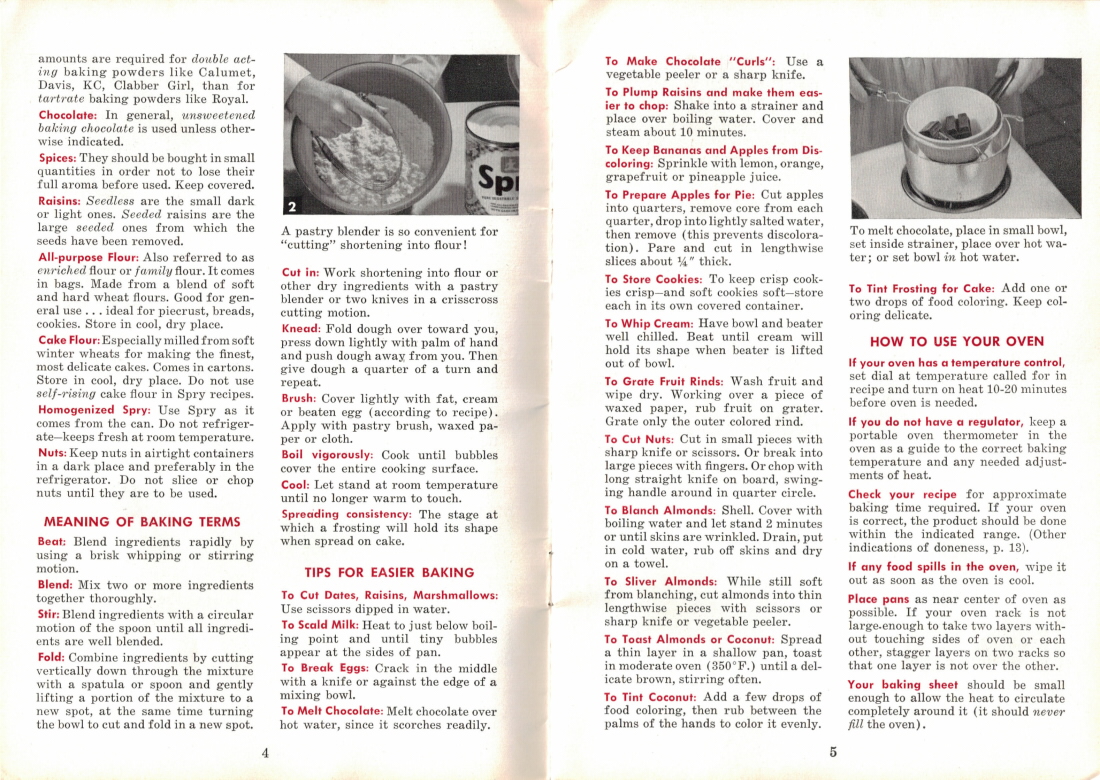
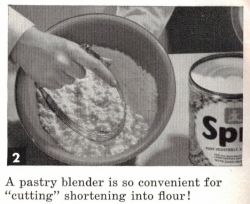 Cut in: Work shortening into flour or other dry ingredients with a pastry blender or two knives in a crisscross cutting motion.
Knead: Fold dough over toward you, press down lightly with palm of hand and push dough away from you. Then give dough a quarter of a turn and repeat.
Brush: Cover lightly with fat, cream or beaten egg (according to recipe). Apply with pastry brush, waxed paper or cloth.
Boil vigorously: Cook until bubbles cover the entire cooking surface.
Cool: Let stand at room temperature until no longer warm to touch.
Spreading consistency: The stage at which a frosting will hold its shape when spread on cake.
Here is the second part of page 3 of the vintage cookbook: Home Baking Made Easy that was published in 1953 by Lever Brothers Company.
To review all pages in this booklet, simply visit the Home Baking Made Easy: Spry Category and click on a page title to review that section.
There are scans of each of the pages, you can click the full-page pictures to view a larger size.
*You can view the scan on the previous page: How To Measure Ingredients.
TIPS ON INGREDIENTS
Eggs: Keep eggs in the refrigerator and take out only the number needed when baking. Remove eggs from the refrigerator about 45 minutes before using. Eggs beat up to larger volume when brought to room temperature.
Milk: Homogenized milk or milk that is not homogenized can be used in Spry recipes, and in many cases skim milk is satisfactory. Canned unsweetened evaporated milk is usually mixed with an equal amount of water.
Buttermilk or Sour Milk: Use interchangeably. Should be fresh and thick.
Cream: Heavy for whipping. Light cream is often used for cooked sauces and frostings.
Granulated Sugar: Cane sugar or beet sugar can be used interchangeably. Sift if lumpy.
Powdered Sugar: A little coarser than confectioners’ sugar. Sift before using.
Confectioners’ Sugar: The finest sugar obtainable. Sift to remove even the tiniest lumps.
Brown Sugar: Light brown sugar has a delicate flavor and is most generally used. Dark brown sugar contains more molasses and has fuller flavor. Either can be used unless otherwise specified. Store in tightly covered container. To prevent lumping, keep a piece of bread with the stored sugar.
Butter or Margarine: In Spry recipes, butter and a high-quality margarine like Good Luck Table Margarine can be used interchangeably.
Baking Powder: In Spry recipes, any type of baking powder can be used in the amount given unless otherwise indicated. In “One-Bowl” cakes smaller amounts are required for double acting baking powders like Calumet, Davis, KC, Clabber Girl, than for tartrate baking powders like Royal.
Chocolate: In general, unsweetened baking chocolate is used unless otherwise indicated.
Spices: They should be bought in small quantities in order not to lose their full aroma before used. Keep covered.
Raisins: Seedless are the small dark or light ones. Seeded raisins are the large seeded ones from which the seeds have been removed.
All-purpose Flour: Also referred to as enriched flour or family flour. It comes in bags. Made from a blend of soft and hard wheat flours. Good for general use . . . ideal for piecrust, breads, cookies. Store in cool, dry place.
Cake Flour: Especially milled from soft winter wheats for making the finest, most delicate cakes. Comes in cartons. Store in cool, dry place. Do not use self-rising cake flour in Spry recipes.
Homogenized Spry: Use Spry as it comes from the can. Do not refrigerate–keeps fresh at room temperature.
Nuts: Keep nuts in airtight containers in a dark place and preferably in the refrigerator. Do not slice or chop nuts until they are to be used.
Here is the first part of page 3 of the vintage cookbook: Home Baking Made Easy that was published in 1953 by Lever Brothers Company.
To review all pages in this booklet, simply visit the Home Baking Made Easy: Spry Category and click on a page title to review that section.
There are scans of each of the pages, you can click the full-page pictures to view a larger size.
 HOW TO MEASURE INGREDIENTS
Flour: When recipe calls for “sifted flour,” always sift once before measuring. Flour packs as it stands and gives an overmeasurement unless it is first “fluffed up.” Sift onto a square of waxed paper. Lift flour lightly by spoonfuls into measuring cup and level off with spatula or back of knife. Do not shake cup or tap on the table.
Sugar: Granulated sugar: Fill up and level off with spatula. If sugar is lumpy, sift it first. Brown sugar: Pack firmly into cup or spoon and level off with a spatula. If lumpy, sift before measuring. Confectioners’ sugar and Powdered sugar: Sift before measuring, then measure like flour.
Baking Powder: Use standard measuring spoons. Dip spoon into can until full, then level off with spatula.
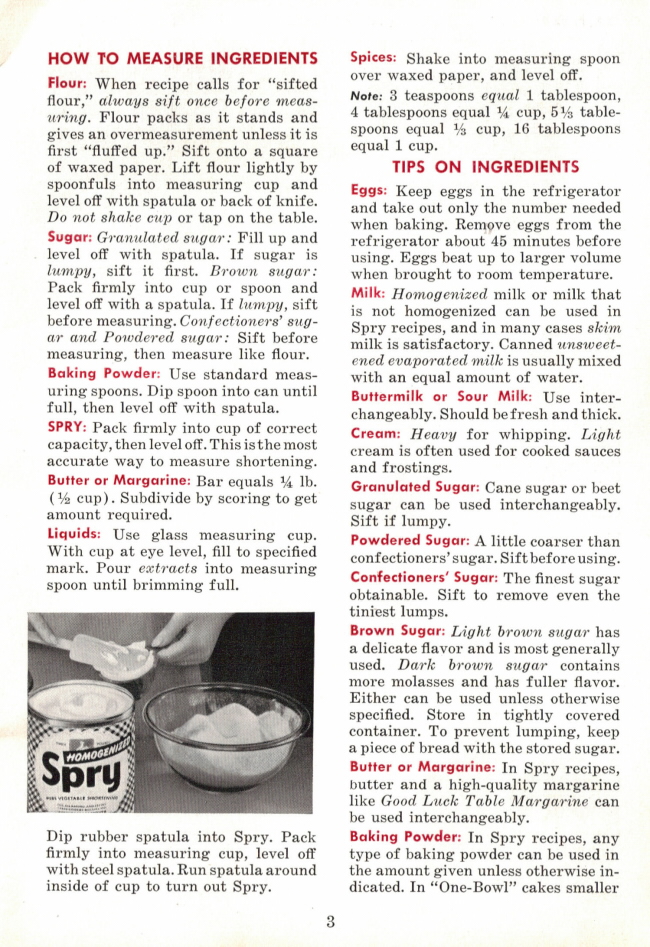
SPRY: Pack firmly into cup of correct capacity, then level off. This is the most accurate way to measure shortening.
Butter or Margarine: Bar equals 1/4 lb. (1/2 cup). Subdivide by scoring to get amount required.
Liquids: Use glass measuring cup. With cup at eye level, fill to specified mark. Pour extracts into measuring spoon until brimming full.
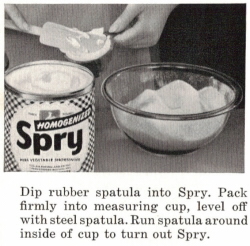 Dip rubber spatula into Spry. Pack firmly into measuring cup, level off with steel spatula. Run spatula around inside of cup to turn out Spry.
Spices: Shake into measuring spoon over waxed paper, and level off.
Note: 3 teaspoons equal 1 tablespoon, 4 tablespoons equal 1/4 cup, 5 1/3 tablespoons equal 1/3 cup, 16 tablespoons equal 1 cup.
RecipeCurio.com

-
Subscribe to Feeds:
