
This recipe was clipped from cardboard packaging, probably a box of Jello. Date is unknown. Recipe is typed below along with a scanned copy.
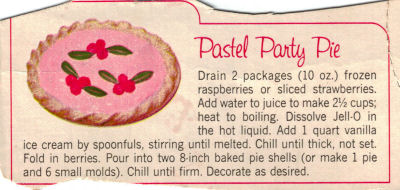
Pastel Party Pie
Drain 2 packages (10 oz.) frozen raspberries or sliced strawberries. Add water to juice to make 2 1/2 cups; heat to boiling. Dissolve Jell-O in the hot liquid. Add 1 quart vanilla ice cream by spoonfuls, stirring until melted. Chill until thick, not set. Fold in berries. Pour into two 8-inch baked pie shells (or make 1 pie and 6 small molds). Chill until firm. Decorate as desired.
 This is a recipe clipping from a newspaper found in a large collection of vintage recipe clippings, the person who saved this wrote “very good” on it, so it must be! Date is unknown but I believe this would be from the 1950s or so. Recipe is typed below along with a scanned copy.
Please make sure to read Important: Safe Canning & Food Preservation before using this recipe.
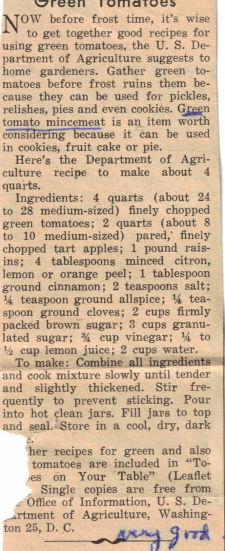
Green Tomatoes
NOW before frost time, it’s wise to get together good recipes for using green tomatoes, the U. S. Department of Agriculture suggests to home gardeners. Gather green tomatoes before frost ruins them because they can be used for pickles, relishes, pies and even cookies. Green tomato mincemeat is an item worth considering because it can be used in cookies, fruit cake or pie.
Here’s the Department of Agriculture recipe to make about 4 quarts.
Ingredients: 4 quarts (about 24 to 28 medium-sized) finely chopped green tomatoes; 2 quarts (about 8 to 10 medium-sized) pared, finely chopped tart apples; 1 pound raisins; 4 tablespoons minced citron, lemon or orange peel; 1 tablespoon ground cinnamon; 2 teaspoons salt; 1/4 teaspoon ground allspice; 1/4 teaspoon ground cloves; 2 cups firmly packed brown sugar; 3 cups granulated sugar; 3/4 cup vinegar; 1/4 to 1/2 cup lemon juice; 2 cups water.
To make: Combine all ingredients and cook mixture slowly until tender and slightly thickened. Stir frequently to prevent sticking. Pour into hot clean jars. Fill jars to top and seal. Store in a cool, dry, dark place.
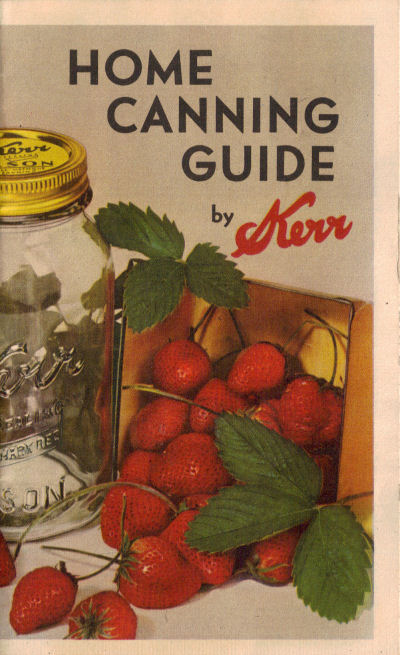 Here are pages 12, 13, 14, the inside back cover and back cover of the vintage Home Canning Guide by Kerr that was published in 1941. The recipe pages are retyped below along with scanned copies of each page.
To view all the pages in this booklet, please visit the Home Canning Guide: Kerr Category. The images are clickable if you’d like to view a larger copy.
Also, please make sure to read Important: Safe Canning & Food Preservation before using any recipes or instructions regarding home canning, things have changed since this booklet was published.
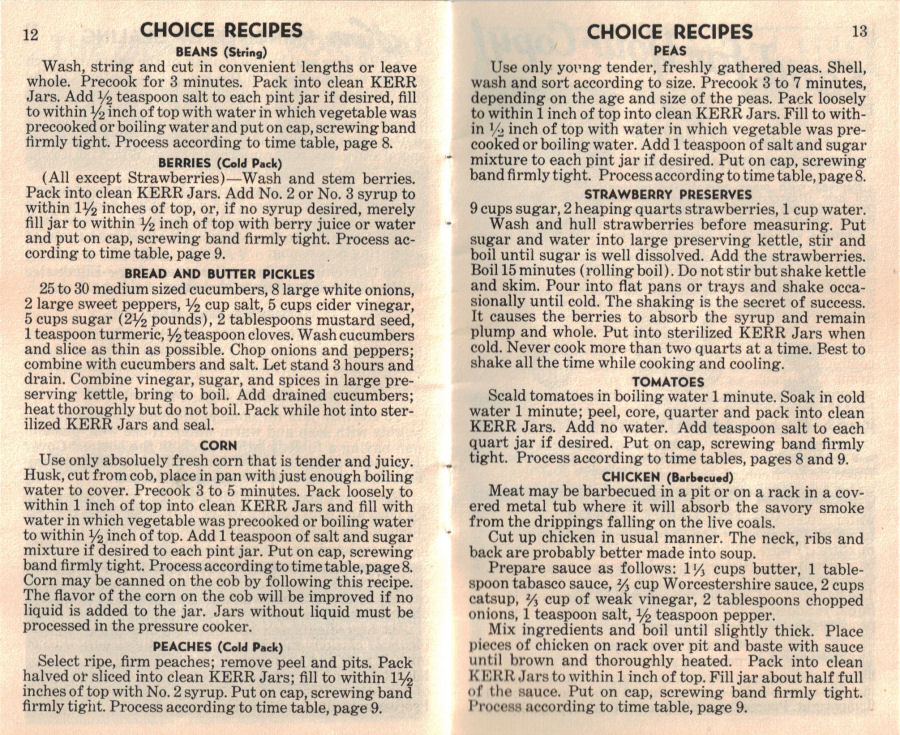
CHOICE RECIPES
BEANS (String)
Wash, string and cut in convenient lengths or leave whole. Precook for 3 minutes. Pack into clean KERR Jars. Add 1/2 teaspoon salt to each pint jar if desired, fill to within 1/2 inch of top with water in which vegetable was precooked or boiling water and put on cap, screwing band firmly tight. Process according to time table, page 8.
BERRIES (Cold Pack)
(All except Strawberries)–Wash and stem berries. Pack into clean KERR Jars. Add No. 2 or No. 3 syrup to within 1 1/2 inches of top, or, if no syrup desired, merely fill jar to within 1/2 inch of top with berry juice or water and put on cap, screwing band firmly tight. Process according to time table, page 9.
BREAD AND BUTTER PICKLES
25 to 30 medium sized cucumbers, 8 large white onions, 2 large sweet peppers, 1/2 cup salt, 5 cups cider vinegar, 5 cups sugar (2 1/2 pounds), 2 tablespoons mustard seed, 1 teaspoon turmeric, 1/2 teaspoon cloves. Wash cucumbers and slice as thin as possible. Chop onions and peppers; combine with cucumbers and salt. Let stand 3 hours and drain. Combine vinegar, sugar, and spices in large preserving kettle, bring to boil. Add drained cucumbers; heat thoroughly but do not boil. Pack while hot into sterilized KERR Jars and seal.
CORN
Use only absolutely fresh corn that is tender and juicy. Husk, cut from cob, place in pan with just enough boiling water to cover. Precook 3 to 5 minutes. Pack loosely to within 1 inch of top into clean KERR Jars and fill with water in which vegetable was precooked or boiling water to within 1/2 inch of top. Add 1 teaspoon of salt and sugar mixture if desired to each pint jar. Put on cap, screwing band firmly tight. Process according to time table, page 8. Corn may be canned on the cob by following this recipe. The flavor of the corn on the cob will be improved if no liquid is added to the jar. Jars without liquid must be processed in the pressure cooker.
PEACHES (Cold Pack)
Select ripe, firm peaches; remove peel and pits. Pack halved or sliced into clean KERR Jars; fill to within 1 1/2 inches of top with No. 2 syrup. Put on cap, screwing band firmly tight. Process according to time table, page 9.
PEAS
Use only young tender, freshly gathered peas. Shell, wash and sort according to size. Precook 3 to 7 minutes, depending on the age and size of the peas. Pack loosely to within 1 inch of top into clean KERR Jars. Fill to within 1/2 inch of top with water in which vegetable was precooked or boiling water. Add 1 teaspoon of salt and sugar mixture to each pint jar if desired. Put on cap, screwing band firmly tight. Process according to time table, page 8.
STRAWBERRY PRESERVES
9 cups sugar, 2 heaping quarts strawberries, 1 cup water.
Wash and hull strawberries before measuring. Put sugar and water into large preserving kettle, stir and boil until sugar is well dissolved. Add the strawberries. Boil 15 minutes (rolling boil). Do not stir but shake kettle and skim. Pour into flat pans or trays and shake occasionally until cold. The shaking is the secret of success. It causes the berries to absorb the syrup and remain plump and whole. Put into sterilized KERR Jars when cold. Never cook more than two quarts at a time. Best to shake all the time while cooking and cooling.
TOMATOES
Scald tomatoes in boiling water 1 minute. Soak in cold water 1 minute; peel, core, quarter and pack into clean KERR Jars. Add no water. Add teaspoon salt to each quart jar if desired. Put on cap, screwing band firmly tight. Process according to time tables, pages 8 and 9.
CHICKEN (Barbecued)
Meat may be barbecued in a pit or on a rack in a covered metal tub where it will absorb the savory smoke from the drippings falling on the live coals.
Cut up chicken in usual manner. The neck, ribs and back are probably better made into soup.
Prepare sauce as follows: 1 1/3 cups butter, 1 tablespoon tabasco sauce, 2/3 cup Worcestershire sauce, 2 cups catsup, 2/3 cup of weak vinegar, 2 tablespoons chopped onions, 1 teaspoon salt, 1/2 teaspoon pepper.
Mix ingredients and boil until slightly thick. Place pieces of chicken on rack over pit and baste with sauce until brown and thoroughly heated. Pack into clean KERR Jars to within 1 inch of top. Fill jar about half full of the sauce. Put on cap, screwing band firmly tight. Process according to time table, page 9.

Here are pages 10 and 11 of the vintage Home Canning Guide by Kerr that was published in 1941. The pages are retyped below along with a scanned copy, you can click to view a larger image.
To view all the pages in this booklet, please visit the Home Canning Guide: Kerr Category.
Also, please make sure to read Important: Safe Canning & Food Preservation before using any recipes or instructions regarding home canning, things have changed since this booklet was published.
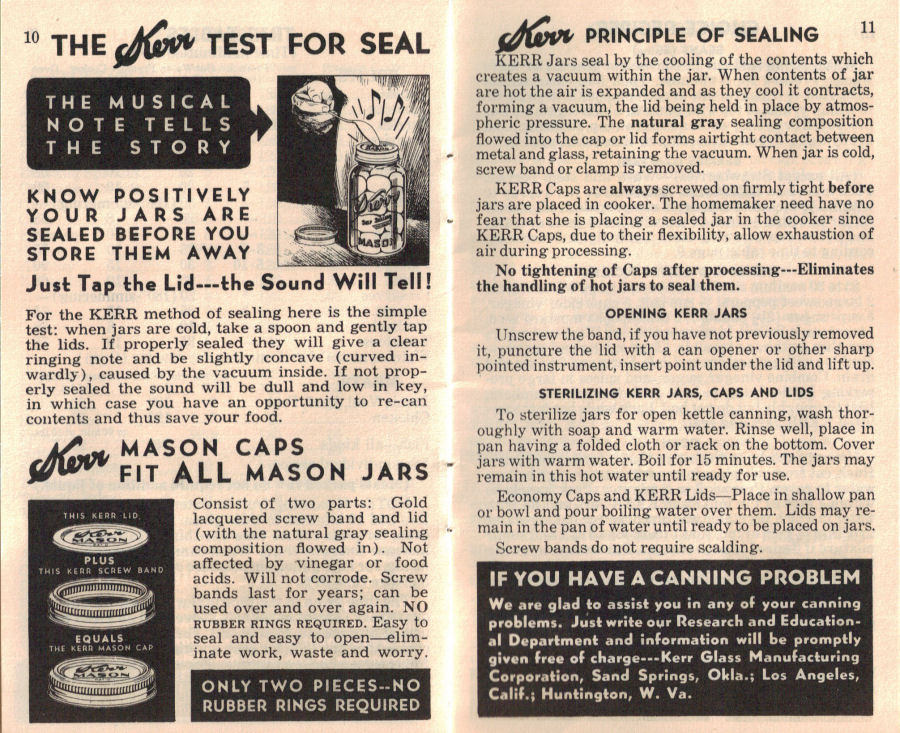 THE KERR TEST FOR SEAL
THE MUSICAL NOTE TELLS THE STORY
KNOW POSITIVELY YOUR JARS ARE SEALED BEFORE YOU STORE THEM AWAY
Just Tap the Lid—the Sound Will Tell!
For the KERR method of sealing here is the simple test: when jars are cold, take a spoon and gently tap the lids. If properly sealed they will give a clear ringing note and be slightly concave (curved inwardly), caused by the vacuum inside. If not properly sealed the sound will be dull and low in key, in which case you have an opportunity to re-can contents and thus save your food.
Kerr MASON CAPS FIT ALL MASON JARS
Consist of two parts: Gold lacquered screw band and lid (with the natural gray sealing composition flowed in). Not affected by vinegar or food acids. Will not corrode. Screw bands last for years; can be used over and over again. NO RUBBER RINGS REQUIRED. Easy to seal and easy to open–eliminate work, waste and worry.
ONLY TWO PIECES–NO RUBBER RINGS REQUIRED
Kerr PRINCIPLE OF SEALING
KERR Jars seal by the cooling of the contents which creates a vacuum within the jar. When contents of jar are hot the air is expanded and as they cool it contracts, forming a vacuum, the lid being held in place by atmospheric pressure. The natural gray sealing composition flowed into the cap or lid forms airtight contact between metal and glass, retaining the vacuum. When jar is cold, screw band or clamp is removed.
KERR Caps are always screwed on firmly tight before jars are placed in cooker. The homemaker need have no fear that she is placing a sealed jar in the cooker since KERR Caps, due to their flexibility, allow exhaustion of air during processing.
No tightening of Caps after processing—Eliminates the handling of hot jars to seal them.
OPENING KERR JARS
Unscrew the band, if you have not previously removed it, puncture the lid with a can opener or other sharp pointed instrument, insert point under the lid and lift up.
STERILIZING KERR JARS, CAPS AND LIDS
To sterilize jars for open kettle canning, wash thoroughly with soap and warm water. Rinse well, place in pan having a folded cloth or rack on the bottom. Cover jars with warm water. Boil for 15 minutes. The jars may remain in this hot water until ready for use.
Economy Caps and KERR Lids—Place in shallow pan or bowl and pour boiling water over them. Lids may remain in the pan of water until ready to be placed on jars.
Screw bands do not require scalding.
Here are pages 8 and 9 of the vintage Home Canning Guide by Kerr that was published in 1941. The pages are a canning time table that I’ve provided scanned copies below, only the notes are retyped. The scanned pages are clickable if you’d like to view a larger copy.
To view all the pages in this booklet, please visit the Home Canning Guide: Kerr Category.
Also, please make sure to read Important: Safe Canning & Food Preservation before using any recipes or instructions regarding home canning, things have changed since this booklet was published.
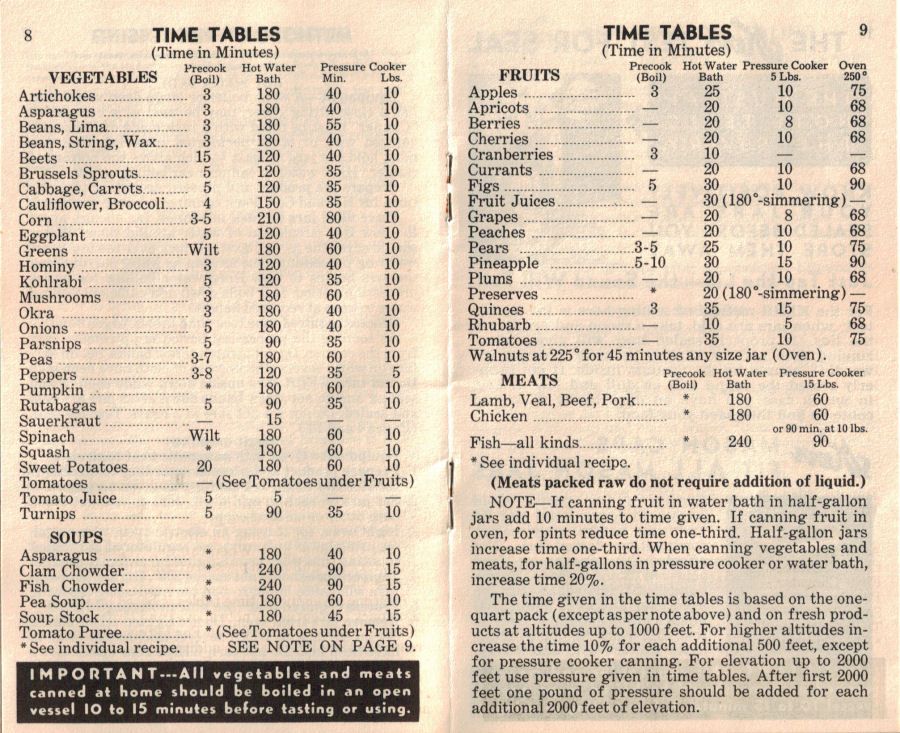
IMPORTANT–All vegetables and meats canned at home should be boiled in an open vessel 10 to 15 minutes before tasting or using.
NOTE—If canning fruit in water bath in half-gallon jars add 10 minutes to time given. If canning fruit in oven, for pints reduce time one-third. Half-gallon jars increase time one-third. When canning vegetables and meats, for half-gallons in pressure cooker or water bath, increase time 20%.
The time given in the time tables is based on the one-quart pack (except as per note above) and on fresh products at altitudes up to 1000 feet. For higher altitudes increase the time 10% for each additional 500 feet, except for pressure cooker canning. For elevation up to 2000 feet use pressure given in time tables. After first 2000 feet one pound of pressure should be added for each additional 2000 feet of elevation.
Here is page 7 of the vintage Home Canning Guide by Kerr that was published in 1941. The page is retyped below along with a scanned copy, you can click it to view a larger image if you like.
To view all the pages in this booklet, please visit the Home Canning Guide: Kerr Category.
Also, please make sure to read Important: Safe Canning & Food Preservation before using any recipes or instructions regarding home canning, things have changed since this booklet was published.
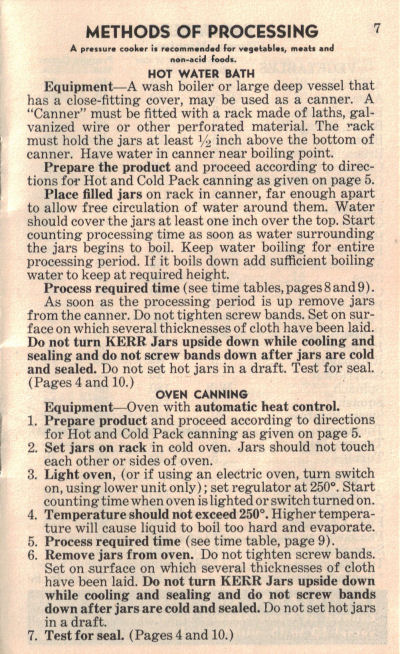 METHODS OF PROCESSING
A pressure cooker is recommended for vegetables, meats and non-acid foods.
HOT WATER BATH
Equipment–A wash boiler or large deep vessel that has a close-fitting cover, may be used as a canner. A “Canner” must be fitted with a rack made of laths, galvanized wire or other perforated material. The rack must hold the jars at least 1/2 inch above the bottom of canner. Have water in canner near boiling point.
Prepare the product and proceed according to directions for Hot and Cold Pack canning as given on page 5.
Place filled jars on rack in canner, far enough apart to allow free circulation of water around them. Water should cover the jars at least one inch over the top. Start counting processing time as soon as water surrounding the jars begins to boil. Keep water boiling for entire processing period. If it boils down add sufficient boiling water to keep at required height.
Process required time (see time tables, pages 8 and 9).
As soon as the processing period is up remove jars from the canner. Do not tighten screw bands. Set on surface on which several thicknesses of cloth have been laid. Do not turn KERR Jars upside down while cooling and sealing and do not screw bands down after jars are cold and sealed. Do not set hot jars in a draft. Test for seal. (Pages 4 and 10.)
OVEN CANNING
Equipment–Oven with automatic heat control.
1. Prepare product and proceed according to directions for Hot and Cold Pack canning as given on page 5.
2. Set jars on rack in cold oven. Jars should not touch each other or sides of oven.
3. Light oven, (or if using an electric oven, turn switch on, using lower unit only); set regulator at 250°. Start counting time when oven is lighted or switch turned on.
4. Temperature should not exceed 250°. Higher temperature will cause liquid to boil too hard and evaporate.
5. Process required time (see time table, page 9).
6. Remove jars from oven. Do not tighten screw bands. Set on surface on which several thicknesses of cloth have been laid. Do not turn KERR Jars upside down while cooling and sealing and do not screw bands down after jars are cold and sealed. Do not set hot jars in a draft.
7. Test for seal. (Pages 4 and 10).
Here is page 6 of the vintage Home Canning Guide by Kerr that was published in 1941. The page is retyped below along with a scanned copy, you can click it to view a larger image if you like.
To view all the pages in this booklet, please visit the Home Canning Guide: Kerr Category.
Also, please make sure to read Important: Safe Canning & Food Preservation before using any recipes or instructions regarding home canning, things have changed since this booklet was published.
 METHODS OF PROCESSING
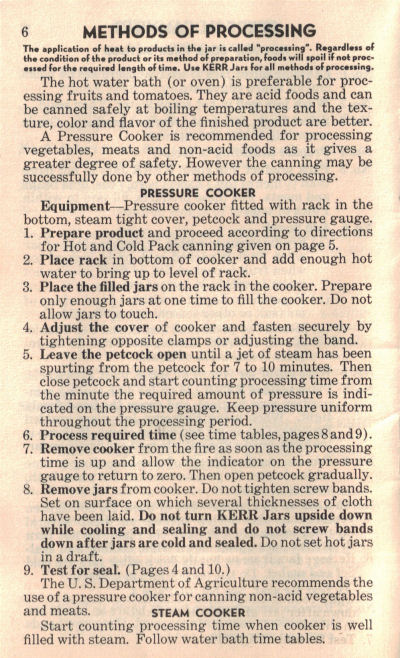
The application of heat to products in the jar is called “processing”. Regardless of the condition of the product or its method of preparation, foods will spoil if not processed for the required length of time. Use KERR Jars for all methods of processing.
The hot water bath (or oven) is preferable for processing fruits and tomatoes. They are acid foods and can be safely at boiling temperatures and the texture, color and flavor of the finished product are better.
A Pressure Cooker is recommended for processing vegetables, meats and non-acid foods as it gives a greater degree of safety. However the canning may be successfully done by other methods of processing.
PRESSURE COOKER
Equipment–pressure cooker fitted with rack in the bottom, steam tight cover, petcock and pressure gauge.
1. Prepare product and proceed according to directions for Hot and Cold Pack canning given on page 5.
2. Place rack in bottom of cooker and add enough hot water to bring up to level of rack.
3. Place the filled jars on the rack in the cooker. Prepare only enough jars at one time to fill the cooker. Do not allow jars to touch.
4. Adjust the cover of cooker and fasten securely by tightening opposite clamps or adjusting the band.
5. Leave the petcock open until a jet of steam has been spurting from the petcock for 7 to 10 minutes. Then close petcock and start counting processing time from the minute the required amount of pressure is indicated on the pressure gauge. Keep pressure uniform throughout the processing period.
6. Process required time (see time tables, pages 8 and 9).
7. Remove cooker from the fire as soon as the processing time is up and allow the indicator on the pressure gauge to return to zero. Then open petcock gradually.
8. Remove jars from cooker. Do not tighten screw bands. Set on surface on which several thicknesses of cloth have been laid. Do not turn KERR Jars upside down while cooling and sealing and do not screw bands down after jars are cold and sealed. Do not set hot jars in a draft.
9. Test for seal. (Pages 4 and 10.)
The U.S. Department of Agriculture recommends the use of a pressure cooker for canning non-acid vegetables and meats.
STEAM COOKER
Start counting processing time when cooker is well filled with steam. Follow water bath time tables.
Here is page 5 of the vintage Home Canning Guide by Kerr that was published in 1941. The page is retyped below along with a scanned copy which is clickable if you’d like to view a larger copy.
To view all the pages in this booklet, please visit the Home Canning Guide: Kerr Category.
Also, please make sure to read Important: Safe Canning & Food Preservation before using any recipes or instructions regarding home canning, things have changed since this booklet was published.
 STEPS IN CANNING
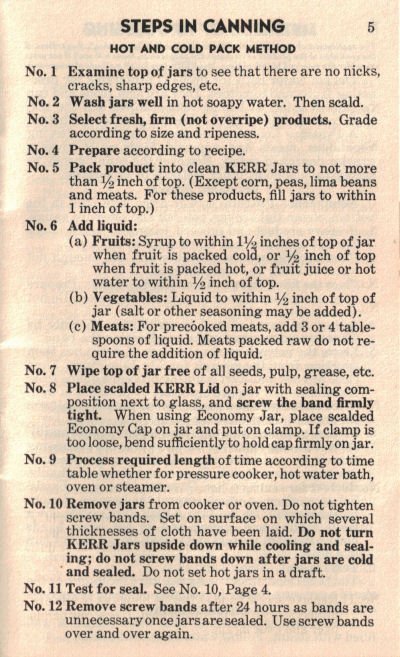
HOT AND COLD PACK METHOD
No. 1 Examine top of jars to see that there are no nicks, cracks, sharp edges, etc.
No. 2 Wash jars well in hot soapy water. Then scald.
No. 3 Select fresh, firm (not overripe) products. Grade according to size and ripeness.
No. 4 Prepare according to recipe.
No. 5 Pack product into clean KERR Jars to not more than 1/2 inch of top. (Except corn, peas, lima beans and meats. For these products, fill jars to within 1 inch of top).
No. 6 Add liquid:
(a) Fruits: Syrup to within 1 1/2 inches of top of jar when fruit is packed cold, or 1/2 inch of top when fruit is packed hot, or fruit juice or hot water to within 1/2 inch of top.
(b) Vegetables: Liquid to within 1/2 inch of top of jar (salt or other seasoning may be added).
(c) Meats: For precooked meats, add 3 or 4 tablespoons of liquid. Meats packed raw do not require the addition of liquid.
No. 7 Wipe top of jar free of all seeds, pulp, grease, etc.
No. 8 Place scalded KERR Lid on jar with sealing composition next to glass, and screw the band firmly tight. When using Economy Jar, place scalded Economy Cap on jar and put on clamp. If clamp is too loose, bend sufficiently to hold cap firmly on jar.
No. 9 Process required length of time according to time table whether for pressure cooker, hot water bath, oven or steamer.
No. 10 Remove jars from cooker or oven. Do not tighten screw bands. Set on surface on which several thicknesses of cloth have been laid. Do not turn KERR Jars upside down while cooling and sealing; do not screw bands down after jars are cold and sealed. Do not set hot jars in a draft.
No. 11 Test for seal. See No. 10, Page 4.
No. 12 Remove screw bands after 24 hours as bands are unnecessary once jars are sealed. Use screw bands over and over again.
RecipeCurio.com

-
Subscribe to Feeds:
