
 Here are pages 10 and 11 of the vintage Home Canning Guide by Kerr that was published in 1941. The pages are retyped below along with a scanned copy, you can click to view a larger image.
To view all the pages in this booklet, please visit the Home Canning Guide: Kerr Category.
Also, please make sure to read Important: Safe Canning & Food Preservation before using any recipes or instructions regarding home canning, things have changed since this booklet was published.
 THE KERR TEST FOR SEAL
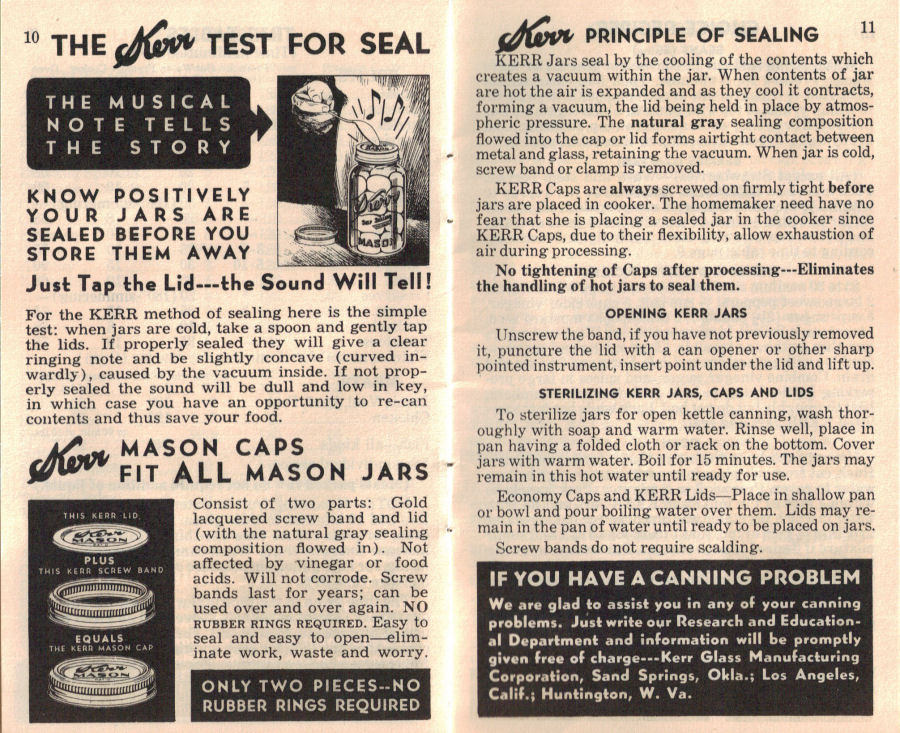
THE MUSICAL NOTE TELLS THE STORY
KNOW POSITIVELY YOUR JARS ARE SEALED BEFORE YOU STORE THEM AWAY
Just Tap the Lid—the Sound Will Tell!
For the KERR method of sealing here is the simple test: when jars are cold, take a spoon and gently tap the lids. If properly sealed they will give a clear ringing note and be slightly concave (curved inwardly), caused by the vacuum inside. If not properly sealed the sound will be dull and low in key, in which case you have an opportunity to re-can contents and thus save your food.
Kerr MASON CAPS FIT ALL MASON JARS
Consist of two parts: Gold lacquered screw band and lid (with the natural gray sealing composition flowed in). Not affected by vinegar or food acids. Will not corrode. Screw bands last for years; can be used over and over again. NO RUBBER RINGS REQUIRED. Easy to seal and easy to open–eliminate work, waste and worry.
ONLY TWO PIECES–NO RUBBER RINGS REQUIRED
Kerr PRINCIPLE OF SEALING
KERR Jars seal by the cooling of the contents which creates a vacuum within the jar. When contents of jar are hot the air is expanded and as they cool it contracts, forming a vacuum, the lid being held in place by atmospheric pressure. The natural gray sealing composition flowed into the cap or lid forms airtight contact between metal and glass, retaining the vacuum. When jar is cold, screw band or clamp is removed.
KERR Caps are always screwed on firmly tight before jars are placed in cooker. The homemaker need have no fear that she is placing a sealed jar in the cooker since KERR Caps, due to their flexibility, allow exhaustion of air during processing.
No tightening of Caps after processing—Eliminates the handling of hot jars to seal them.
OPENING KERR JARS
Unscrew the band, if you have not previously removed it, puncture the lid with a can opener or other sharp pointed instrument, insert point under the lid and lift up.
STERILIZING KERR JARS, CAPS AND LIDS
To sterilize jars for open kettle canning, wash thoroughly with soap and warm water. Rinse well, place in pan having a folded cloth or rack on the bottom. Cover jars with warm water. Boil for 15 minutes. The jars may remain in this hot water until ready for use.
Economy Caps and KERR Lids—Place in shallow pan or bowl and pour boiling water over them. Lids may remain in the pan of water until ready to be placed on jars.
Screw bands do not require scalding.
 More Recipes For You To Enjoy:

3 Responses to Principle of Sealing – Vintage Home Canning Guide
Where can I purchase some Kerr caps & seals for the Kerr jars? It seems impossible to find in Canada.
Thanks, Annette
I’ve canned baked goods in Kerr Jars before but it’s been so long I forgot the process and when to put the sealing lid on…after or before baking. Anyone familiar with this particular process?
I have been canning for years, but this year several flat lids bend in the cooker while under pressure. They seem to seal, but I worry about the safety. If they have the same sound when tapped with a spoon as the others, are they safe to eat?
RecipeCurio.com

-
Subscribe to Feeds:
